Five simple hand stitches and when to use them
Last updated: June 3, 2026 · about 6 minutes
A machine is not always at hand, and some repairs are faster done by hand anyway. These five stitches cover the majority of clothing fixes: closing a seam, securing a hem invisibly, joining two edges, and reattaching a button. Each one has a job it does better than the others.
Before you start
Thread a needle with a length you can manage — roughly the distance from your hand to your elbow — and knot one end for most stitches. Match the thread colour to the garment, and pull each stitch only until it lies flat, not so tight that the fabric puckers.
1. Running stitch
The simplest stitch: the needle weaves in and out at even intervals, creating a dashed line on both sides. It is quick but not strong, which makes it right for basting — a temporary line that holds layers in place before machine sewing — and for light gathering.
2. Backstitch
The hand equivalent of a machine straight stitch and the strongest of the group. Each stitch doubles back over the previous one, leaving a solid line on top. Use it where a seam takes strain, such as closing the inseam of a trouser leg or repairing a split side seam.
When to choose it
If the seam will be stretched or pulled in wear, backstitch. The overlap is what gives it strength a running stitch cannot match.
3. Slip stitch (blind hem)
The slip stitch catches only a thread or two of the outer fabric, so the stitching is nearly invisible from the right side. It is the standard choice for finishing a folded hem on trousers or a skirt by hand, and for closing a lining opening neatly.
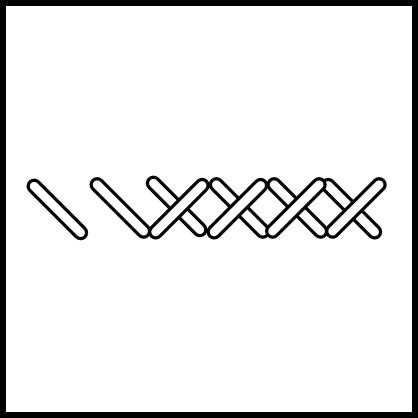
4. Whipstitch
A series of slanted stitches that wrap over two edges to hold them together. It is fast and works well for joining the edges of felt or other non-fraying material, tacking a patch in place, or closing a gap where strength matters less than speed.
5. Buttonhole stitch and reattaching a button
The buttonhole stitch forms a knotted loop along an edge, resisting fraying — the same principle that finishes the raw edge of a worked buttonhole. For everyday repairs the most common task is reattaching a button:
- Anchor. Bring the needle up through the fabric at the button position and make a small securing stitch.
- Sew through the holes. Pass up and down through the button holes several times, keeping a matchstick under a flat button to leave a thread shank.
- Form the shank. Remove the spacer and wind the thread around the threads beneath the button a few times.
- Knot off. Take the thread to the back and tie off against the existing stitches.
Choosing the right one
| Task | Best stitch |
|---|---|
| Holding layers before machine sewing | Running stitch (basting) |
| Repairing a seam under strain | Backstitch |
| Invisible hem finish | Slip stitch |
| Joining two edges quickly | Whipstitch |
| Reattaching a button | Button-sewing with a shank |
A broader overview of stitch families and their history is available on the textile stitch reference page.